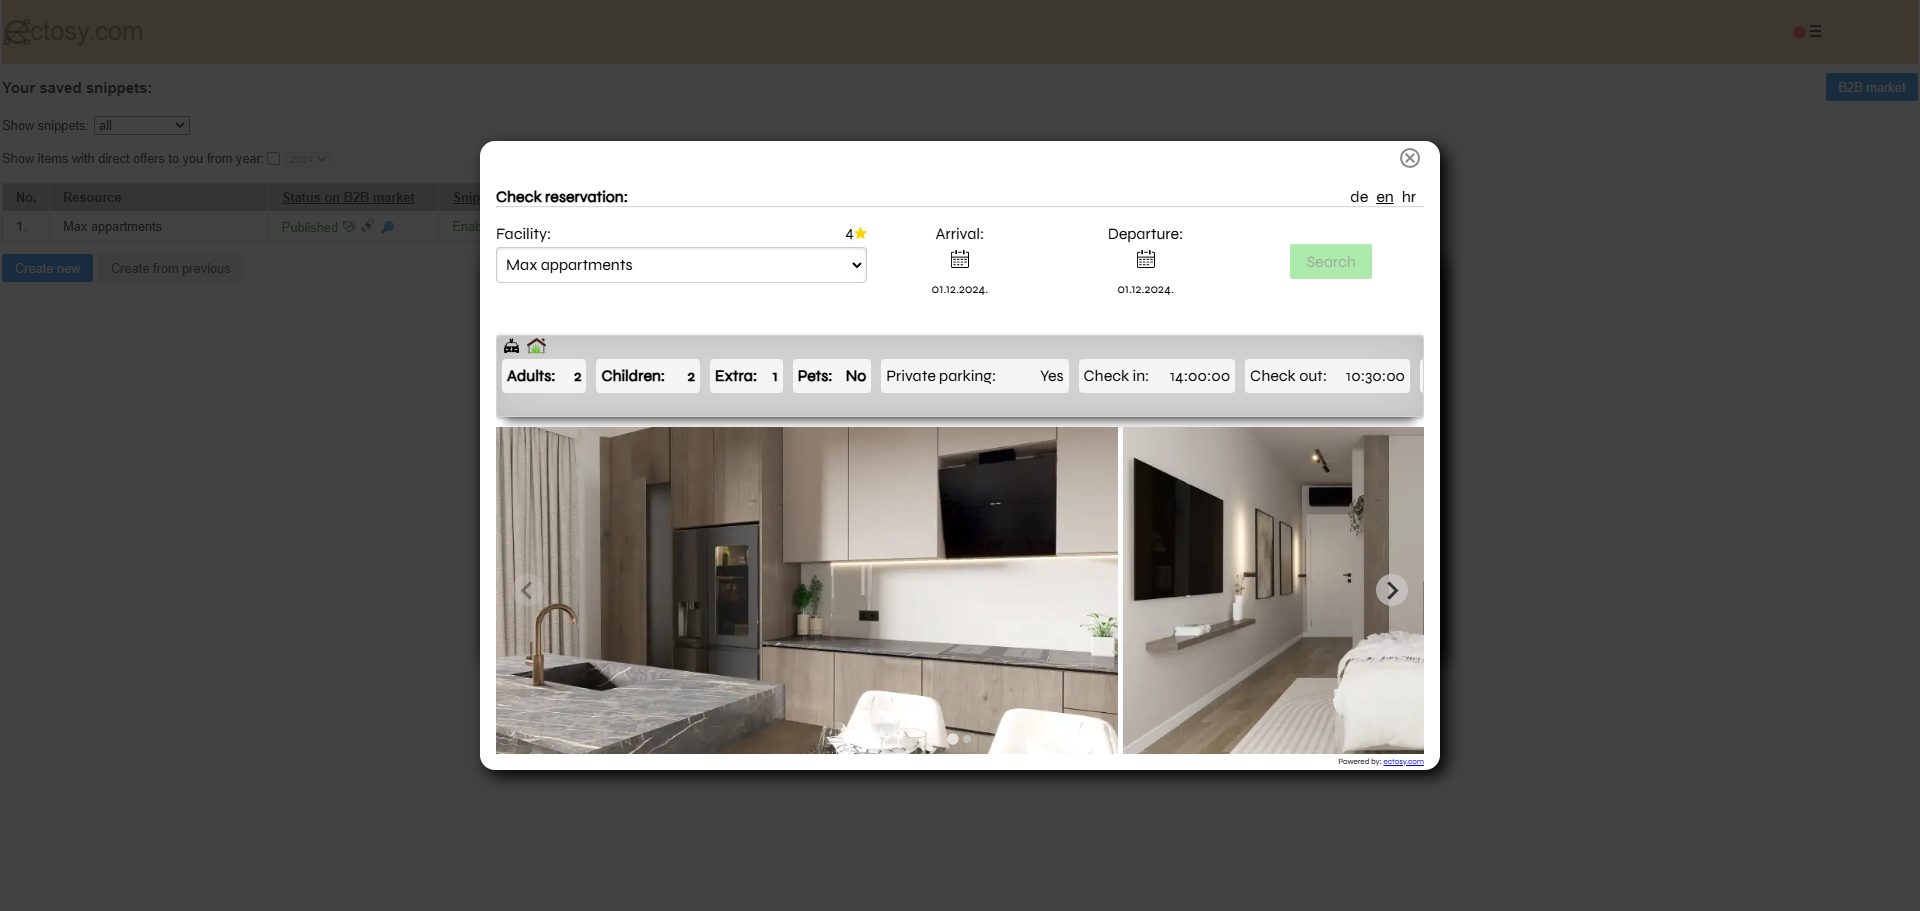
Snippet is a piece of code (HTML/CSS/JS) that web browsers understand and present as a visual element on user's screen. Ectosy snippet is more than that - it also functions as a clickable entry point by which potential customer can express his interest for stay in some tourist accomodation.
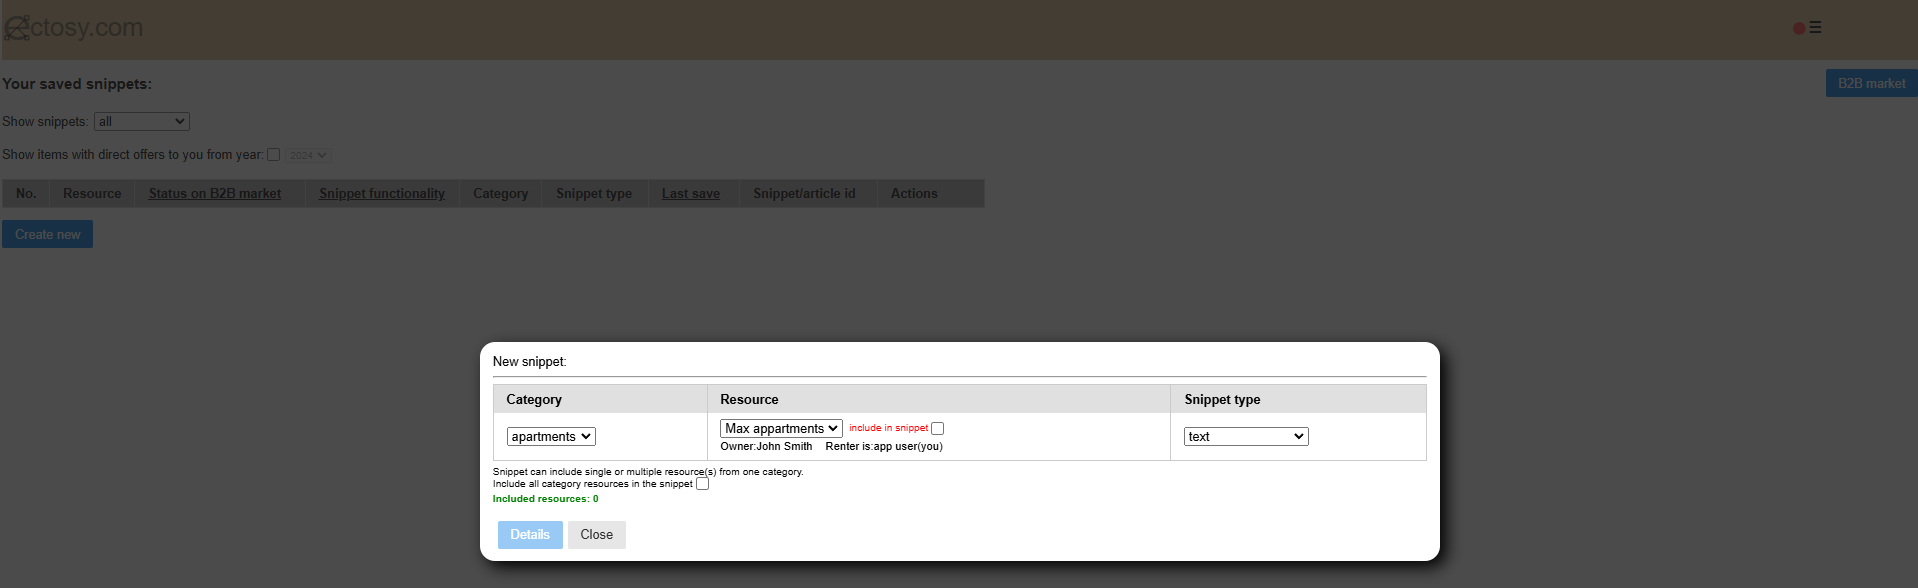
Click on 'My Ectosy snippet' option in the main Promotion dashboard, after that on the blue 'Create new' button and you will get this dialogue:

There are five types of snippets you can create in Ectosy app:
1. custom (predefined): vertical, horizontal and rectangle templates that we have prepared and which you can further tweak by adjusting their specific properties (colors, texts, fonts etc.)
2. image: create snippet from some position image or any other image you choose to upload, also with options to add text and tweak some image properties
3. text: create snippet from the text sequence you type
4. button: create snippet from your personalized button
5. custom (enter/generate code): you can manually create or copy/paste any HTML/CSS code from any source and make it Ectosy or, even better, ask AI to generate code for an element you will describe
Promoted resource:Ectosy snippet can promote one or more resources. All resources one snippet promotes must fall within the same category. For example, one snippet cannot promote hotel rooms and hotel apartments. You will need two snippets for that: one promoting rooms and second promoting apartments.
A snippet can promote multiple resources - unless they are more than 30 kms apart.

Note: in order to be promoted by a snippet, the resource needs to have at least one position with defined geolocation
So, common first step for all snippets types described below is to select category and resource(s) it will promote.
This way of creating snippets is most practical for usual situations. Below the 'Snippet type' selector there is a second one where you can choose one of predefined snippets from 'horizontal', 'vertical' and 'rectangular' categories. Below the snippet visual presentation there are its specific properties you can change.
If the snippet contains background image, you will be able to choose some position image you have uploaded while saving resource.
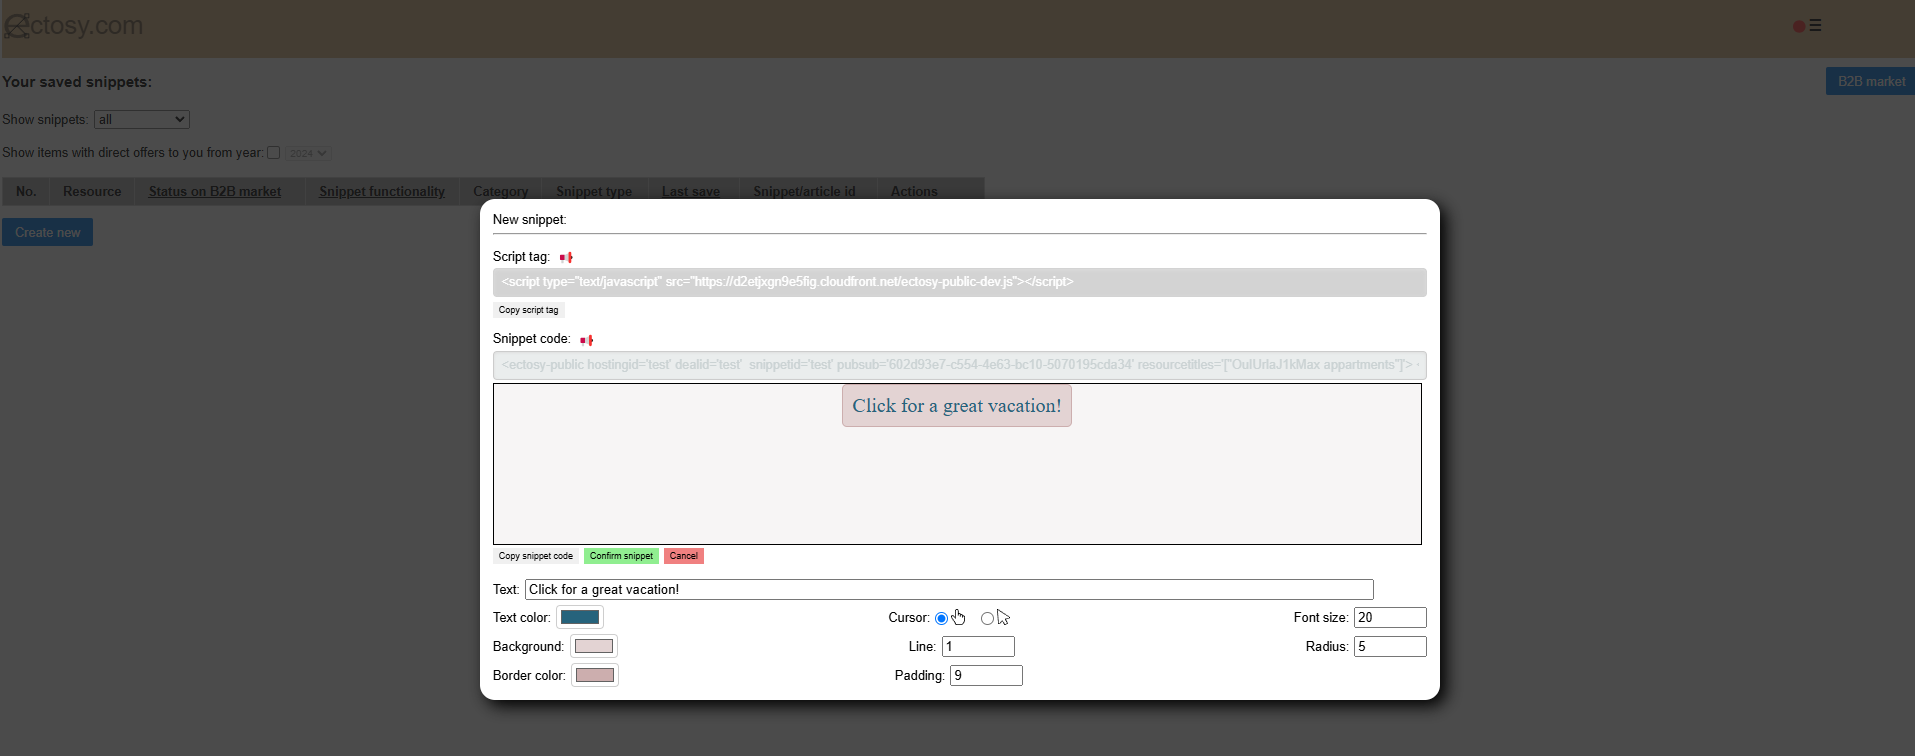
When you finish click on the blue 'Next' button and you will see your snippet finalized, together with its code. After you save ('Confirm snippet' button) the snippet first time, you can copy the code from here and use it. However, do that only for testing purposes because you want to register it in order to follow its results.


Click on the blue 'Details' button and you will see form with multiple fields you can change for your image snippet. First, decide on the picture you will use: it can be the one you have already uploaded for positions or you can upload a different one. You can leave its original resolution or set the size you need.

Let's say I need to make it Leaderboard (728x90px), with rounded corners and CTA text 'Visit your winter retreat':

Everything looks ok, I click on the green 'Confirm snippet' button and the snippet is added to my snippets list ready to use.


All snippets consist of a code browsers interpret and present on the screen as various visual elements. This is the way you can create them by asking the AI to generate the code according to your prompt or you can manually type/paste it.
Generating code with AI (we presume you have saved your AI API key in User/AI API Keys):Let's say you want to use AI:
You need to compose a prompt in order to let AI know what kind of element you want. You can select one of the standard dimensions or choose 'Custom' - but in that case you should include dimensions in the prompt.
Note: If you are using one of the Google's (Gemini) models you will be able to extend your conversation with AI and tweak the result with multiple following prompts.

After entering prompt click on the 'Generate code' button, wait for the AI code and then click on the blue 'Next' button for the visual presentation.

It's ok but you would like to make some changes and you click on the 'Continue conversation' button to give some additional instructions to the AI.

After clicking on 'Generate code' button and 'Next' button you get AI code for this visual:

It's good enough and you are in a hurry so you save it by clicking on the green 'Confirm snippet' button.

Let's say you have a HTML/CSS code for a very interesting button you want to use for your promotional campaign. Select options 'custom (enter/generate code)' + 'Html/Css separate entry' and after that copy-paste code in the form.

Confirm the snippet and you see the expected visual: catchy button with very interesting animated 'electricity' on-hover border effect.

Confirm it and that's it. You have your snippet ready for promotion.

Button code copied from: https://codepen.io/jwktje/pen/JjBaJBv
Snippet is a piece of code (HTML/CSS/JS) that web browsers understand and present as a visual element on user's screen. Ectosy snippet is more than that - it also functions as a clickable entry point by which potential customer can express his interest for stay in some tourist accomodation.
Click on 'My Ectosy snippet' option in the main Promotion dashboard, after that on the blue 'Create new' button and you will get this dialogue:

There are five types of snippets you can create in Ectosy app:
1. custom (predefined): vertical, horizontal and rectangle templates that we have prepared and which you can further tweak by adjusting their specific properties (colors, texts, fonts etc.)
2. image: create snippet from some position image or any other image you choose to upload, also with options to add text and tweak some image properties
3. text: create snippet from the text sequence you type
4. button: create snippet from your personalized button
5. custom (enter/generate code): you can manually create or copy/paste any HTML/CSS code from any source and make it Ectosy or, even better, ask AI to generate code for an element you will describe
Promoted resource:Ectosy snippet can promote one or more resources. All resources one snippet promotes must fall within the same category. For example, one snippet cannot promote hotel rooms and hotel apartments. You will need two snippets for that: one promoting rooms and second promoting apartments.
A snippet can promote multiple resources - unless they are more than 30 kms apart.

Note: in order to be promoted by a snippet, the resource needs to have at least one position with defined geolocation
So, common first step for all snippets types described below is to select category and resource(s) it will promote.
This way of creating snippets is most practical for usual situations. Below the 'Snippet type' selector there is a second one where you can choose one of predefined snippets from 'horizontal', 'vertical' and 'rectangular' categories. Below the snippet visual presentation there are its specific properties you can change.
If the snippet contains background image, you will be able to choose some position image you have uploaded while saving resource.
When you finish click on the blue 'Next' button and you will see your snippet finalized, together with its code. After you save ('Confirm snippet' button) the snippet first time, you can copy the code from here and use it. However, do that only for testing purposes because you want to register it in order to follow its results.


Click on the blue 'Details' button and you will see form with multiple fields you can change for your image snippet. First, decide on the picture you will use: it can be the one you have already uploaded for positions or you can upload a different one. You can leave its original resolution or set the size you need.

Let's say I need to make it Leaderboard (728x90px), with rounded corners and CTA text 'Visit your winter retreat':

Everything looks ok, I click on the green 'Confirm snippet' button and the snippet is added to my snippets list ready to use.


All snippets consist of a code browsers interpret and present on the screen as various visual elements. This is the way you can create them by asking the AI to generate the code according to your prompt or you can manually type/paste it.
Generating code with AI (we presume you have saved your AI API key in User/AI API Keys):Let's say you want to use AI:
You need to compose a prompt in order to let AI know what kind of element you want. You can select one of the standard dimensions or choose 'Custom' - but in that case you should include dimensions in the prompt.
Note: If you are using one of the Google's (Gemini) models you will be able to extend your conversation with AI and tweak the result with multiple following prompts.

After entering prompt click on the 'Generate code' button, wait for the AI code and then click on the blue 'Next' button for the visual presentation.

It's ok but you would like to make some changes and you click on the 'Continue conversation' button to give some additional instructions to the AI.

After clicking on 'Generate code' button and 'Next' button you get AI code for this visual:

It's good enough and you are in a hurry so you save it by clicking on the green 'Confirm snippet' button.

Let's say you have a HTML/CSS code for a very interesting button you want to use for your promotional campaign. Select options 'custom (enter/generate code)' + 'Html/Css separate entry' and after that copy-paste code in the form.

Confirm the snippet and you see the expected visual: catchy button with very interesting animated 'electricity' on-hover border effect.

Confirm it and that's it. You have your snippet ready for promotion.

Button code copied from: https://codepen.io/jwktje/pen/JjBaJBv